Shliff Guide: How to Structure and Validate Your Ideas
This guide walks you through the brainstorming app step by step: from your first voice capture, through structuring with AI and sharpening on the idea map, to concrete research tasks and testing your assumptions with small, measurable hurdles. For an overview of the features, see the Shliff homepage.
1. What is Shliff — and who is it for?
Shliff turns a vague idea into a branched idea map — so you build the right thing, not the first thing. It is built for solo founders and anyone who wants to capture and test ideas on the go, before sinking time into them. Every map is an idea tree: you speak or write an idea, branch it out and test its riskiest assumption with a measurable hurdle. The individual features are explained in detail below.
2. All ideas: where every idea starts
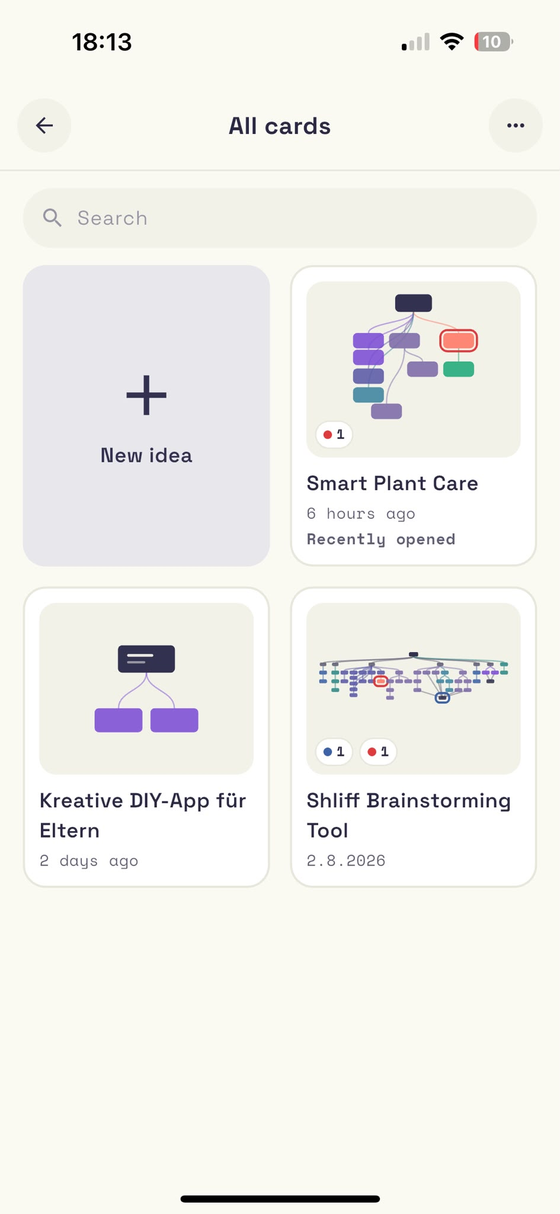
“All ideas” is your starting point. Every idea sits here side by side — each as a preview of its map, with a counter for open hurdles. “+ New idea” creates the next one: you speak it into the microphone or write it down, and Shliff turns it into its own idea map with your idea as the root node. From there you keep branching.
Your ideas can be organised in folders; any map can be moved between folder levels later on.
3. Capturing an idea: speak or write
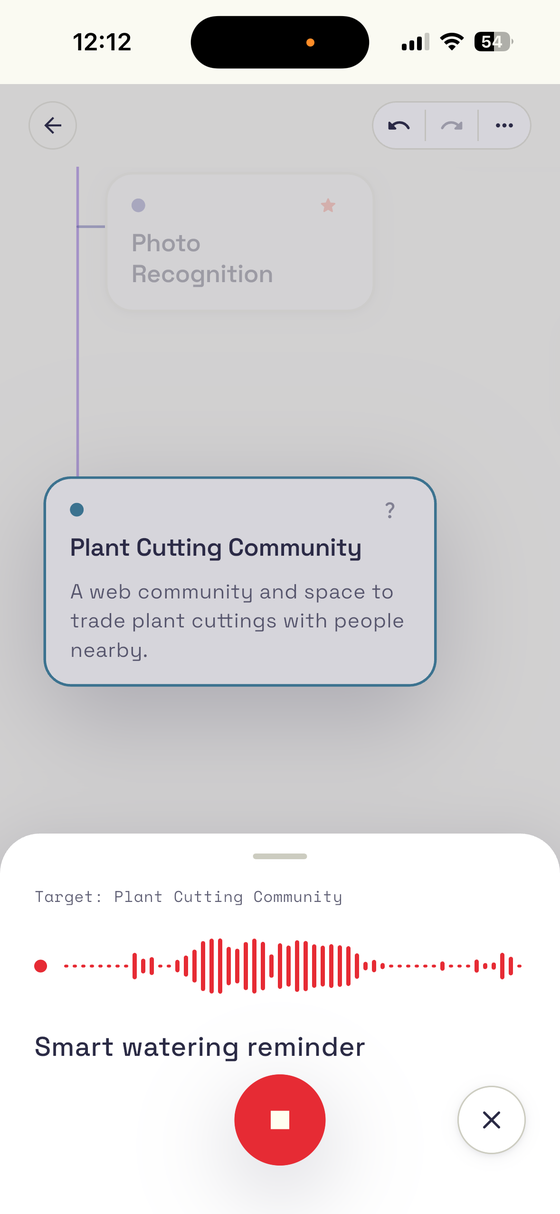
The fastest way: tap the microphone once and describe your idea in one sentence as a voice recording — tapping “Stop” ends the recording.
Depending on your settings, speech recognition runs either through your operating system's speech recognition or through Whisper (offline on your device; the model ships with the app).
Prefer typing? Choose “Write” and enter your idea as text.
4. “New sub-idea”: raw text becomes a node
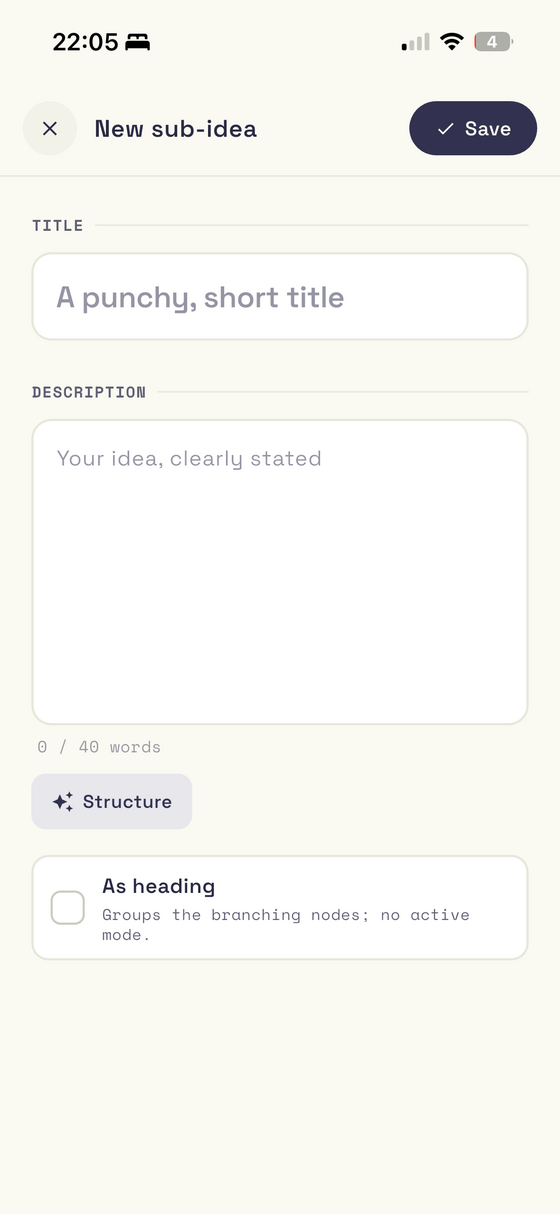
After recording (or writing) you land in the “New sub-idea” form: the title on top, the description with your raw text below. Tap “Structure” — the AI turns it into a punchy title and a clear description. “Save” places the node on the map; from there you keep branching.
Below the description sits the “As heading” checkbox. It turns the node into a pure structuring card — useful when a branch grows too wide: “Marketing”, “Tech”, “Costs”, with the actual ideas beneath. A heading behaves differently from an idea node:
- It groups whatever branches off it — a title above a bundle of ideas, without a description of its own.
- It has no active mode: no chat, no sorting chips, no hurdle. A heading is not a claim, so there is nothing on it to test.
- Its node menu only offers “Reconnect” and “Delete”.
- It does not count against the free node quota.
You can flip the checkbox at any time — via Edit → “As heading” a structuring card becomes an idea again, and the other way round.
5. The idea map: sharpening nodes
Every idea lives as a tree on an idea map. A node responds to taps in stages:
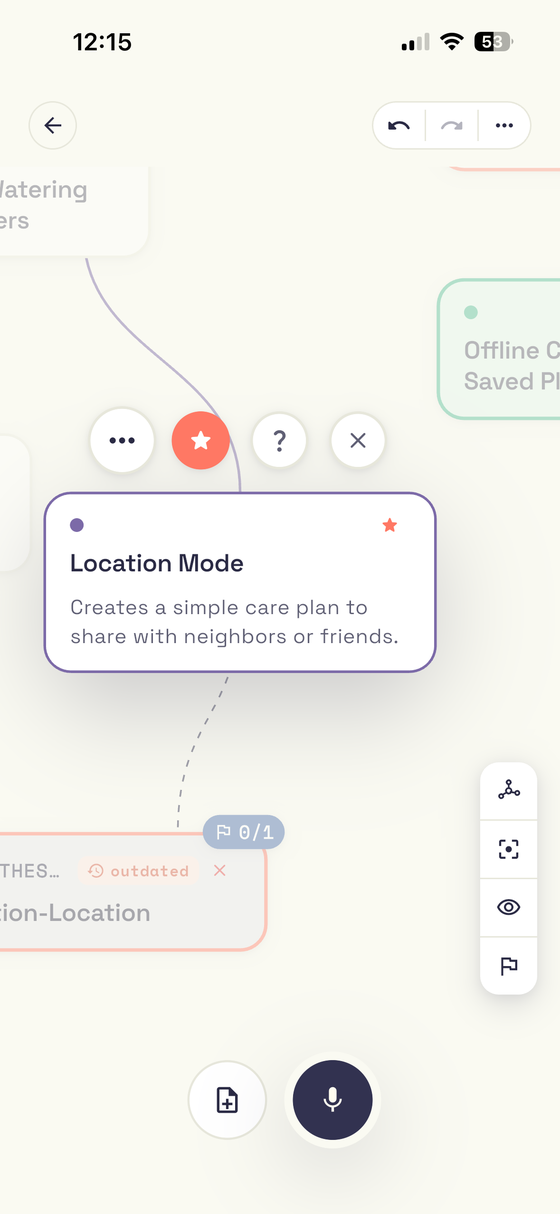
- The first tap selects the node: the chips appear (★ Important, ? Maybe, ✕ Discarded, plus hurdle, AI chat and the three-dot menu), and the description shows clipped to two lines — the clipping signals that there is more to read. This is also where you branch off (write or microphone).
- The second tap unfolds the description fully; the chips stay put.
- The third tap deselects.
- A double tap on the unfolded node opens editing for title and description.
- Dragging moves a node into place, as long as it isn't selected. The root stays where it is.
There is no second stage where there is nothing to unfold: headings, nodes without a description, AI info nodes, and discarded nodes. A synthesis behaves like any other node: the first tap shows its title and how many points it holds (“Show 25 points”), the second unfolds the list. There, the second tap already deselects, and a double tap opens editing directly.
On the selected node you can also use the chat function to question it further. Via the node's own context menu you can re-parent any node or remove it entirely.
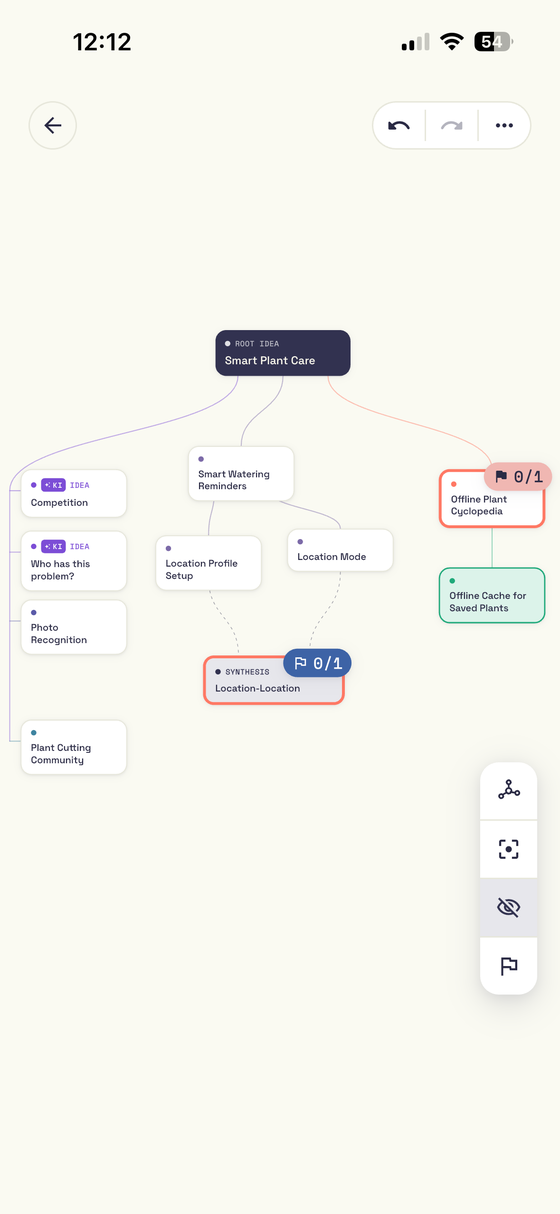
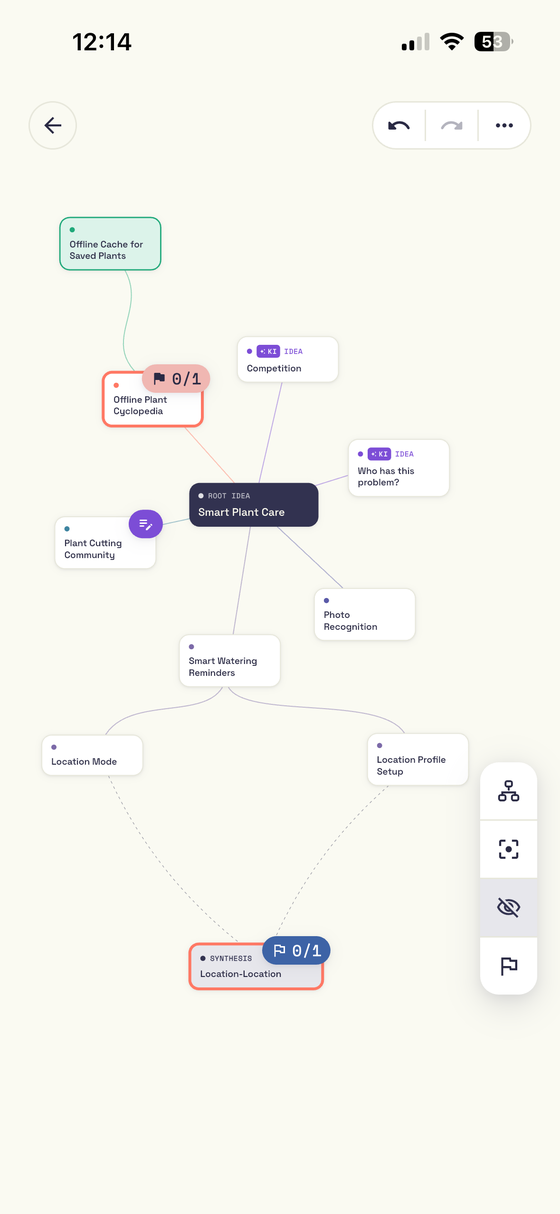
- Tree or radial layout: use the layout switcher to change between the tree view and the radial view (“Switch to radial”).
- Hide discarded: hides all discarded nodes and reconnects the remaining ones.
- Hurdle branches only (flag button): shows just the branches that carry hurdle work — each one with the path from the root, so you can see what the hurdle belongs to, and with its full sub-branch, where the result and any pivot live. Tap again (“Show everything”) to bring the whole map back. Everything that carries a hurdle chip on the node is included: running hurdles as well as the research phase and passed ones.
6. Sorting: Important · Maybe · Discarded
Use the chips on the node to sort: important, maybe or discarded. This way you always know which branches matter, even in large trees. Discarded nodes aren't gone: you can reactivate them later. When discarding, you decide whether only this node or the entire sub-branch is discarded (“Discard this node only” / “Discard including sub-branch”).
7. Branching nodes
You branch new nodes directly off the selected node — via “Write” for text or via the microphone as a voice note. The new sub-idea then hangs as a child of the chosen node. This lets you develop individual aspects of your idea deliberately, branch by branch.
8. Research: tasks with sources
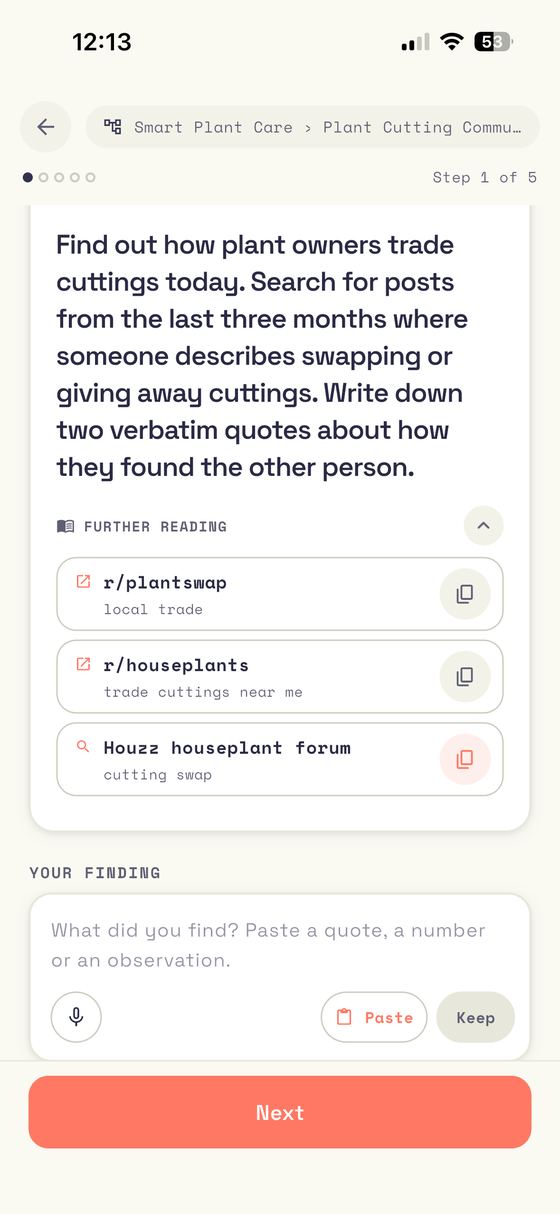
Before any assumption is made, Shliff sends you out: every hurdle comes with one to three research tasks. Each one says concretely what to find out — and brings sources where looking is worth your time.
Every source shows its search term. There are two kinds, told apart by the icon:
- ↗ Search already filled in: the link opens the site with the query ready — one tap and you are in the results.
- 🔍 Search there yourself: this site cannot be pre-filled. The button next to it copies the term to your clipboard; paste it into the site's search box.
Whatever you find goes under “Your finding” — typed, spoken or pasted straight from the clipboard. Each finding becomes its own entry; several per task is the normal case.
Only from those findings does the AI derive the assumption worth testing, and turn it into a measurable experiment. The order is deliberate: an assumption made before the research would be the AI's guess — not yours, and backed by nothing.
9. Hurdles: test assumptions instead of believing them
A hurdle takes one assumption from your research and turns it into an experiment with two numbers: a target — the number at which you keep going — and a deadline, usually three to fourteen days. You enter both yourself; the AI's suggestion is only a suggestion.
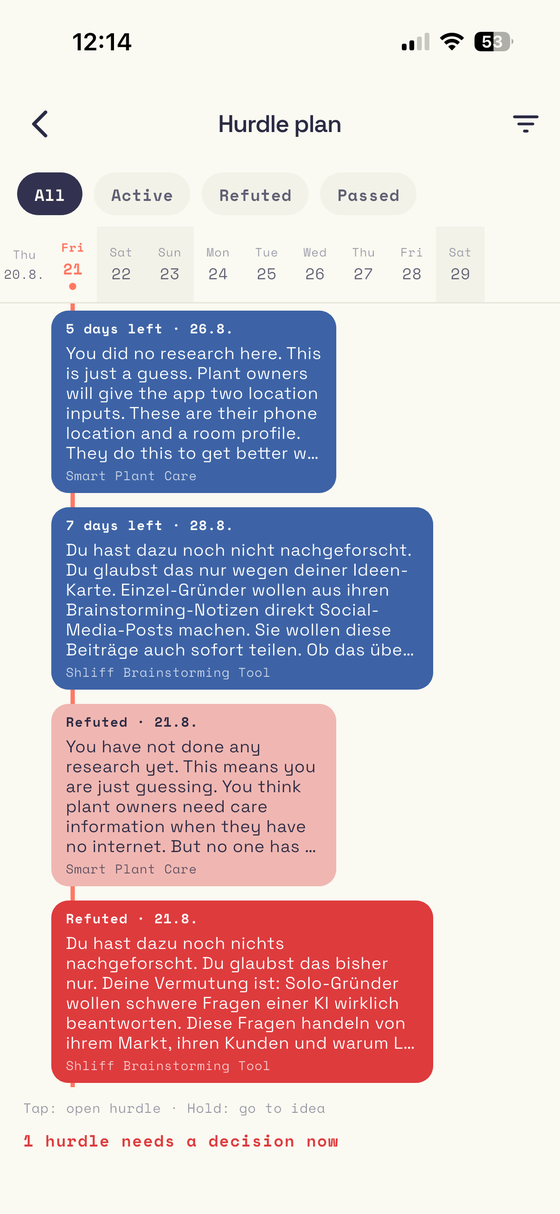
Then you go out and measure. The hurdle plan (on the home screen) shows every running hurdle on a timeline: what is due when, what is running, what has passed or been refuted. One day before each deadline the app checks in and asks for the number.
On the deadline Shliff evaluates on its own: target reached means passed, otherwise refuted. If you counted nothing, you counted zero — that is a result too. Then you have to decide, and that is exactly what hurdles are for:
- Next hurdle here — the idea holds; on to the next assumption.
- Pivot — the assumption fell, so the AI proposes a new direction. It appears as its own node beneath the old one; the tested branch stays visible, together with what closed it. A pivot is not a fresh start but an evidenced change of direction.
- Discard — this node (or the whole sub-branch) is done. Discarded is not deleted: you can reactivate it any time.
- Park — not now. The decision stays open and keeps nagging: red chip on the node, counter on the home screen, entry in the plan. Parked means postponed, not settled.
Refuted never means “the idea is worthless” — only that this one assumption is wrong. That is why the way forward sits right in the result instead of a dead end.
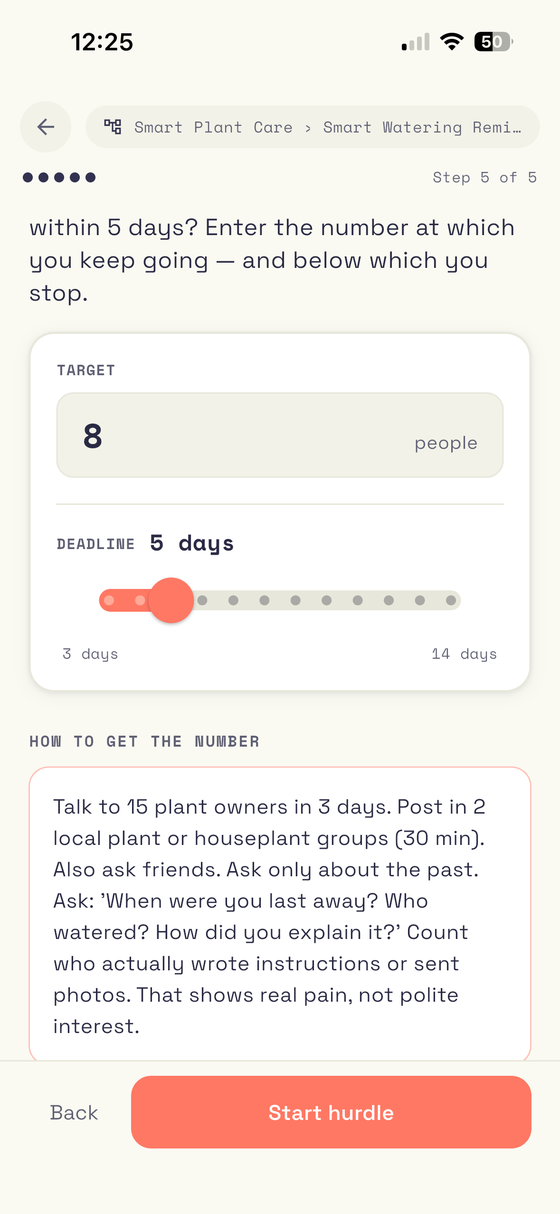
The real test: a landing page. At some point enough assumptions have been tested and the question grows bigger: does anyone want this at all? For that, the root node — your idea at the very top — carries the menu entry “Real test: landing page”. Instead of one more partial assumption you put the whole thing in front of a real page: you build a landing page in a few minutes, send visitors to it and count how many press the one button.
Shliff takes you there in four steps:
- Your selection — First you decide what the page is even about. Everything on the map is included by default; you take out branches that do not belong. Each row shows how many nodes that drops, and tapping “?” opens what is inside the branch.
- The one promise — From that selection the AI condenses one sentence and the label for one button. Nothing else goes on the page, and that is exactly what makes the number unambiguous at the end. If you change the selection afterwards, “New promise” writes the sentence again.
- Where will you build the page? — You pick your tool — Framer, Lovable, bolt.new, v0 or one of your own — and have the prompt written for it. Copy, paste into the tool, publish. You also get the path for reading your number there later.
- How visitors get there — One sentence on where the traffic should come from. Then, as with any hurdle, you enter your target number and set the deadline between three and fourteen days. “Start test”.
After that the real test is an ordinary hurdle: it sits on the timeline in the hurdle plan, checks in before the deadline, and on the day Shliff evaluates — target reached means passed, otherwise refuted. The follow-up decisions are the same too, only Discard is missing: the root of your idea cannot be thrown away. One real test runs per map; while it runs, the entry on the root node reads “Real test: measure” and leads straight to counting. If you break off in between, your progress is kept as a draft.
The hurdle plan suggests the real test on its own once you have passed two hurdles on a map. It is not a requirement — you can start it at any time. Since the promise and the prompt come out of it, the AI has to be available.
10. Synthesis: merging branches
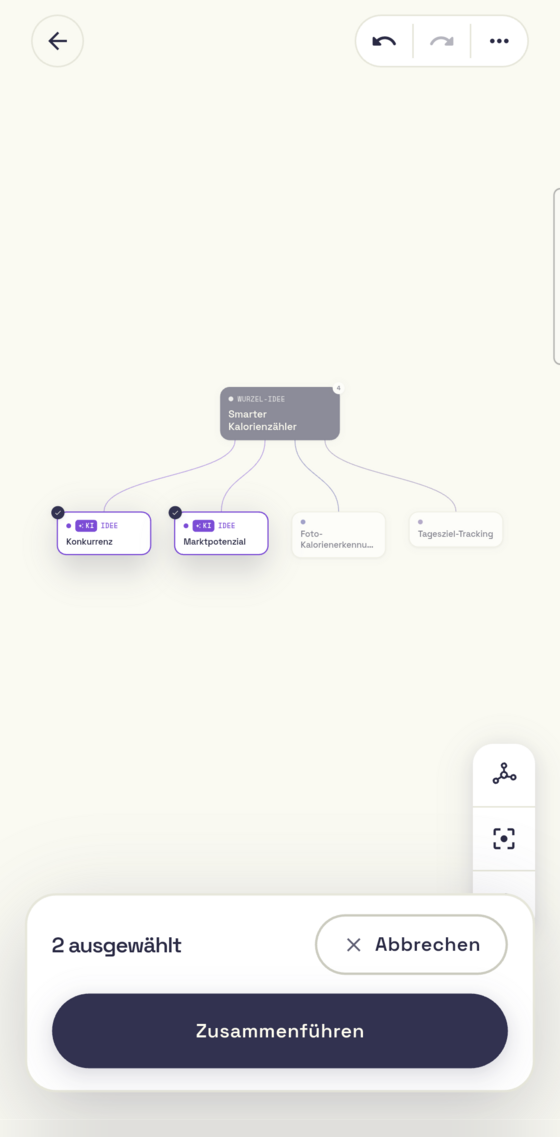
Good thoughts are often scattered across different branches. Long-press a node to start multi-select, then tap as many more as belong together. The selection bar shows how long the synthesis will be (“5 selected · makes 14 points”) — the number depends on how deep the chosen nodes sit in their branches, not just on how many you pick. “Merge” combines the selected nodes into a new synthesis node. A synthesis only works between different branches — and needs at least two source branches. Discarded source nodes must be reactivated before a synthesis.
11. Export
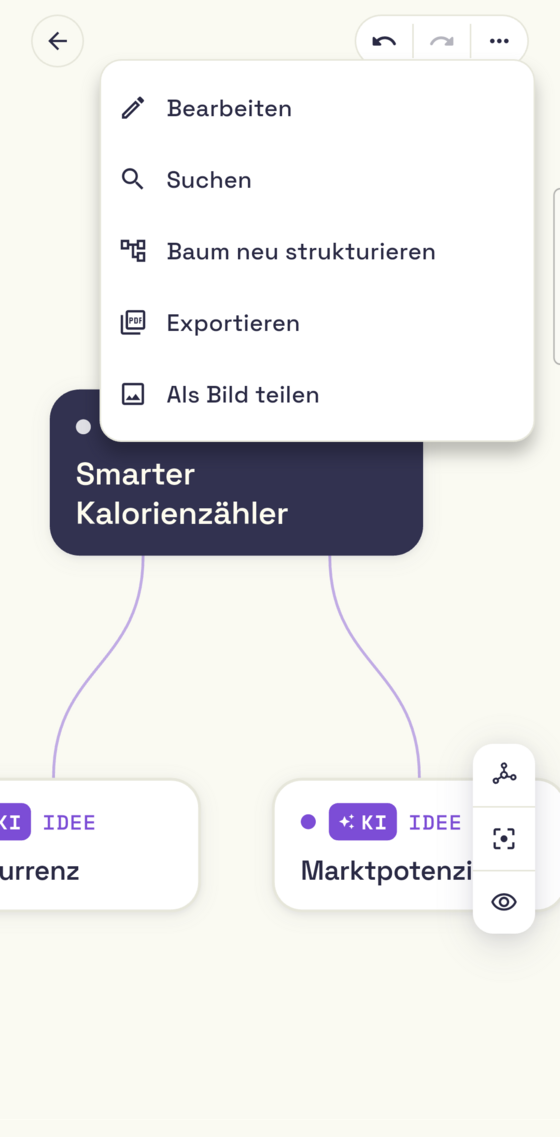
Via a map's context menu — reached through the three dots in the top-right corner of the map — you can export the map as a PDF or share it as an image (PNG).